I bought this lovely chair about 3 years ago for £5. It's beautifully turned and evidently quite old. I've always had a thing for Victorian pine furniture and it's actually quite fashionable at the moment. That's great as it makes my house suddenly seem quite fashionable but unfortunately it means it costs more. I'm not sure what wood it is, it's not the colour for pine but that's about as far as my knowledge goes. I love that it's been around for over 100 years and has history, not to mention, boy they made stuff well and it lasts. I've been meaning to do it for ages but to be honest I've been balancing precariously on it for 10 minutes a day whilst I do my hair and makeup for over 3 years.
I saw a pin on pinterest on how to upholster a dining chair so I thought I'd get started.
 |
| The chair before it's bath |
As you can see the chair had never had a seat, judging by the holes in it I imagine there was some kind of woven reed seat at some point.
First things first I gave it a good clean up with warm water and washing up liquid.
Next we put PVA in the joints that had come apart and hammered them together with a rubber hammer. We used bungee cords to keep the joints tight whilst the glue dried.
I used some pinterest research to find a method to refinish wood furniture. I decided on a recipe that mixes three quarters olive oil with one quarter vinegar. The site suggests apple cider or white wine vinegar. Now the cider vinegar is for the chooks, white wine is for cooking. In my cupboard that left red wine vinegar (still cooking), malt vinegar (for my chips) and distilled (for pickling). I went with distilled as it's cheap and colourless. I mixed them in a jam jar, shook it and rubbed it on with a duster. I was really surprised but it brought out the colour in the wood, leaves no residue and has stayed looking lovely even once it dried.

 |
| Before and after the homemade wood finish |
As the chair needed a seat pad, I traced the outline of the seat onto some card and used it to cut a seat from some plywood that came as part of a delivery crate.
 |
| Cut plywood base |
I used another pinterest find from the The family handyman to upholster the pad. I used a 2 inch foam seat pad, some batting and some fabric from a closing down sale at a local fabric shop (sad times I spend hours here as a kid)
Here's a quick how to for those that are interested
1 Place the batting on a table top, followed by the foam and then the wooden seat. Cut the batting about 4 inches larger than the seat pad. Pull the batting taught and put one staple in each of the four sides. I also added a rolled up piece to the rear corners of my pad as it was ever so slightly too small.

2 Cut covering material 4 inches wider than the pad, place over batting. Turn seat over and staple one staple into the front edge. Centre any pattern and staple once along the rear of the seat.
3 Start at the front middle staple and working toward the corners, stretching the material evenly, staple every 2 inches. Keep the staples within an inch of the edge securing the batting and fabric at the same time. Continually check pattern alignment.
4 Repeat along the back of the seat and then the sides.

5 Cut any excess batting and material from the bottom of the seat.
6 Experiment with folding the corners to achieve a neat effect. I found that a different tuck was required on the front and rear of the seat due to the angle of the corner. Staple down and the chair is upholstered.
 |
| Rear corner |
 |
| Front corner |
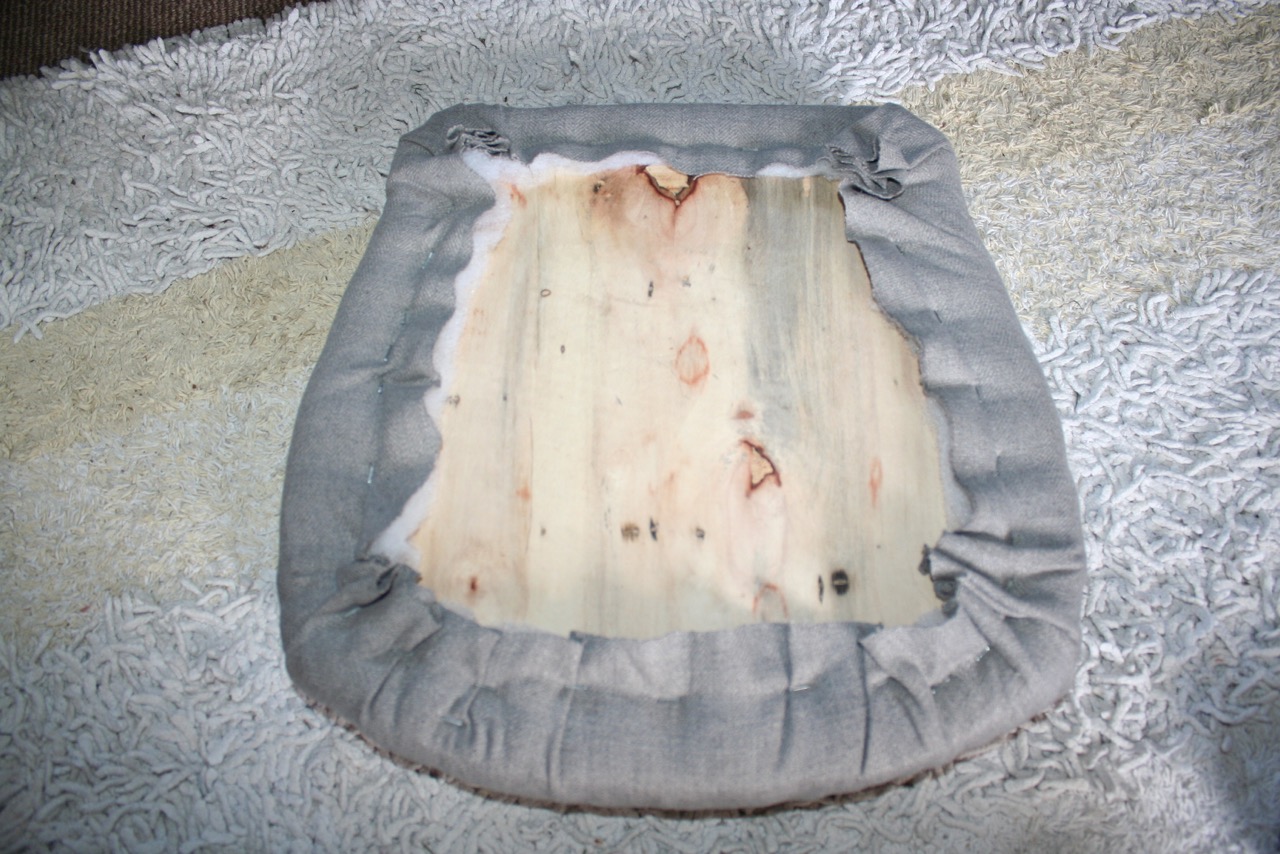 |
| Seat completed and corners stapled in |
7 In some tutorials it is suggested you used weed membrane as a dust cover to neaten up the bottom of the pad, but to be honest I didn't bother.
8 Lastly I secured the seat to the chair using some L shaped brackets that I rescued from our old kitchen. They needed straightening but were easy to attach, et voila, c'est fini.
 |
| L brackets before straightening |
 |
| Pad covered |
So here's the seat all spruced up and ready for me to sit on. I just love a decorating project!
 |
| The end result |
Really nice job, the chair has not changed but it has a modern twist with the seat, can I come shopping with you, you find interesting things.
ReplyDeleteThanks ladies, Marlene come shopping at my local vintage store, I'm lucky as it's the only shop within walking distance and they keep quite a lot of furniture that needs attention, my favourite.
DeleteLovely chair!
ReplyDeleteGood info! Lovely chair!
ReplyDelete